Getting Started#
This section describes the initial setup and basic workflow in Photon, including project creation, test definition, execution, and result review.
System Requirements#
Photon is a web-based platform and does not require local installation.
Supported Platforms#
Use a modern web browser (latest versions recommended):
- Google Chrome
- Mozilla Firefox
- Microsoft Edge
Network & Access#
- Stable internet connection
- Access to the application under test from Photon’s execution environment
Additional Setup#
No additional setup is required for:
- Test automation frameworks
- Local execution environments
- CI/CD configuration
- Infrastructure management
Account & Workspace Setup#
To begin working with Photon, create an account and access a workspace.
Creating an Account#
- Open the Photon application
- Register using a work email
- Confirm the email address
Workspace Overview#
After signing in, the user is directed to the Projects page.
This page displays all projects available in the current workspace, including:
- Project name and key
- Project owner (lead)
- Visibility (public or private)
A workspace can include multiple team members, allowing collaborative quality assurance workflows.
First-Time Setup#
If no projects exist, the list will be empty.
To begin working with Photon, create a project. See the instructions in Creating Your First Project.
Selecting a Project#
To continue working:
- Select a project.
- The system opens the selected project.
After selecting a project, the user is placed in the project context, where the following sections are available:
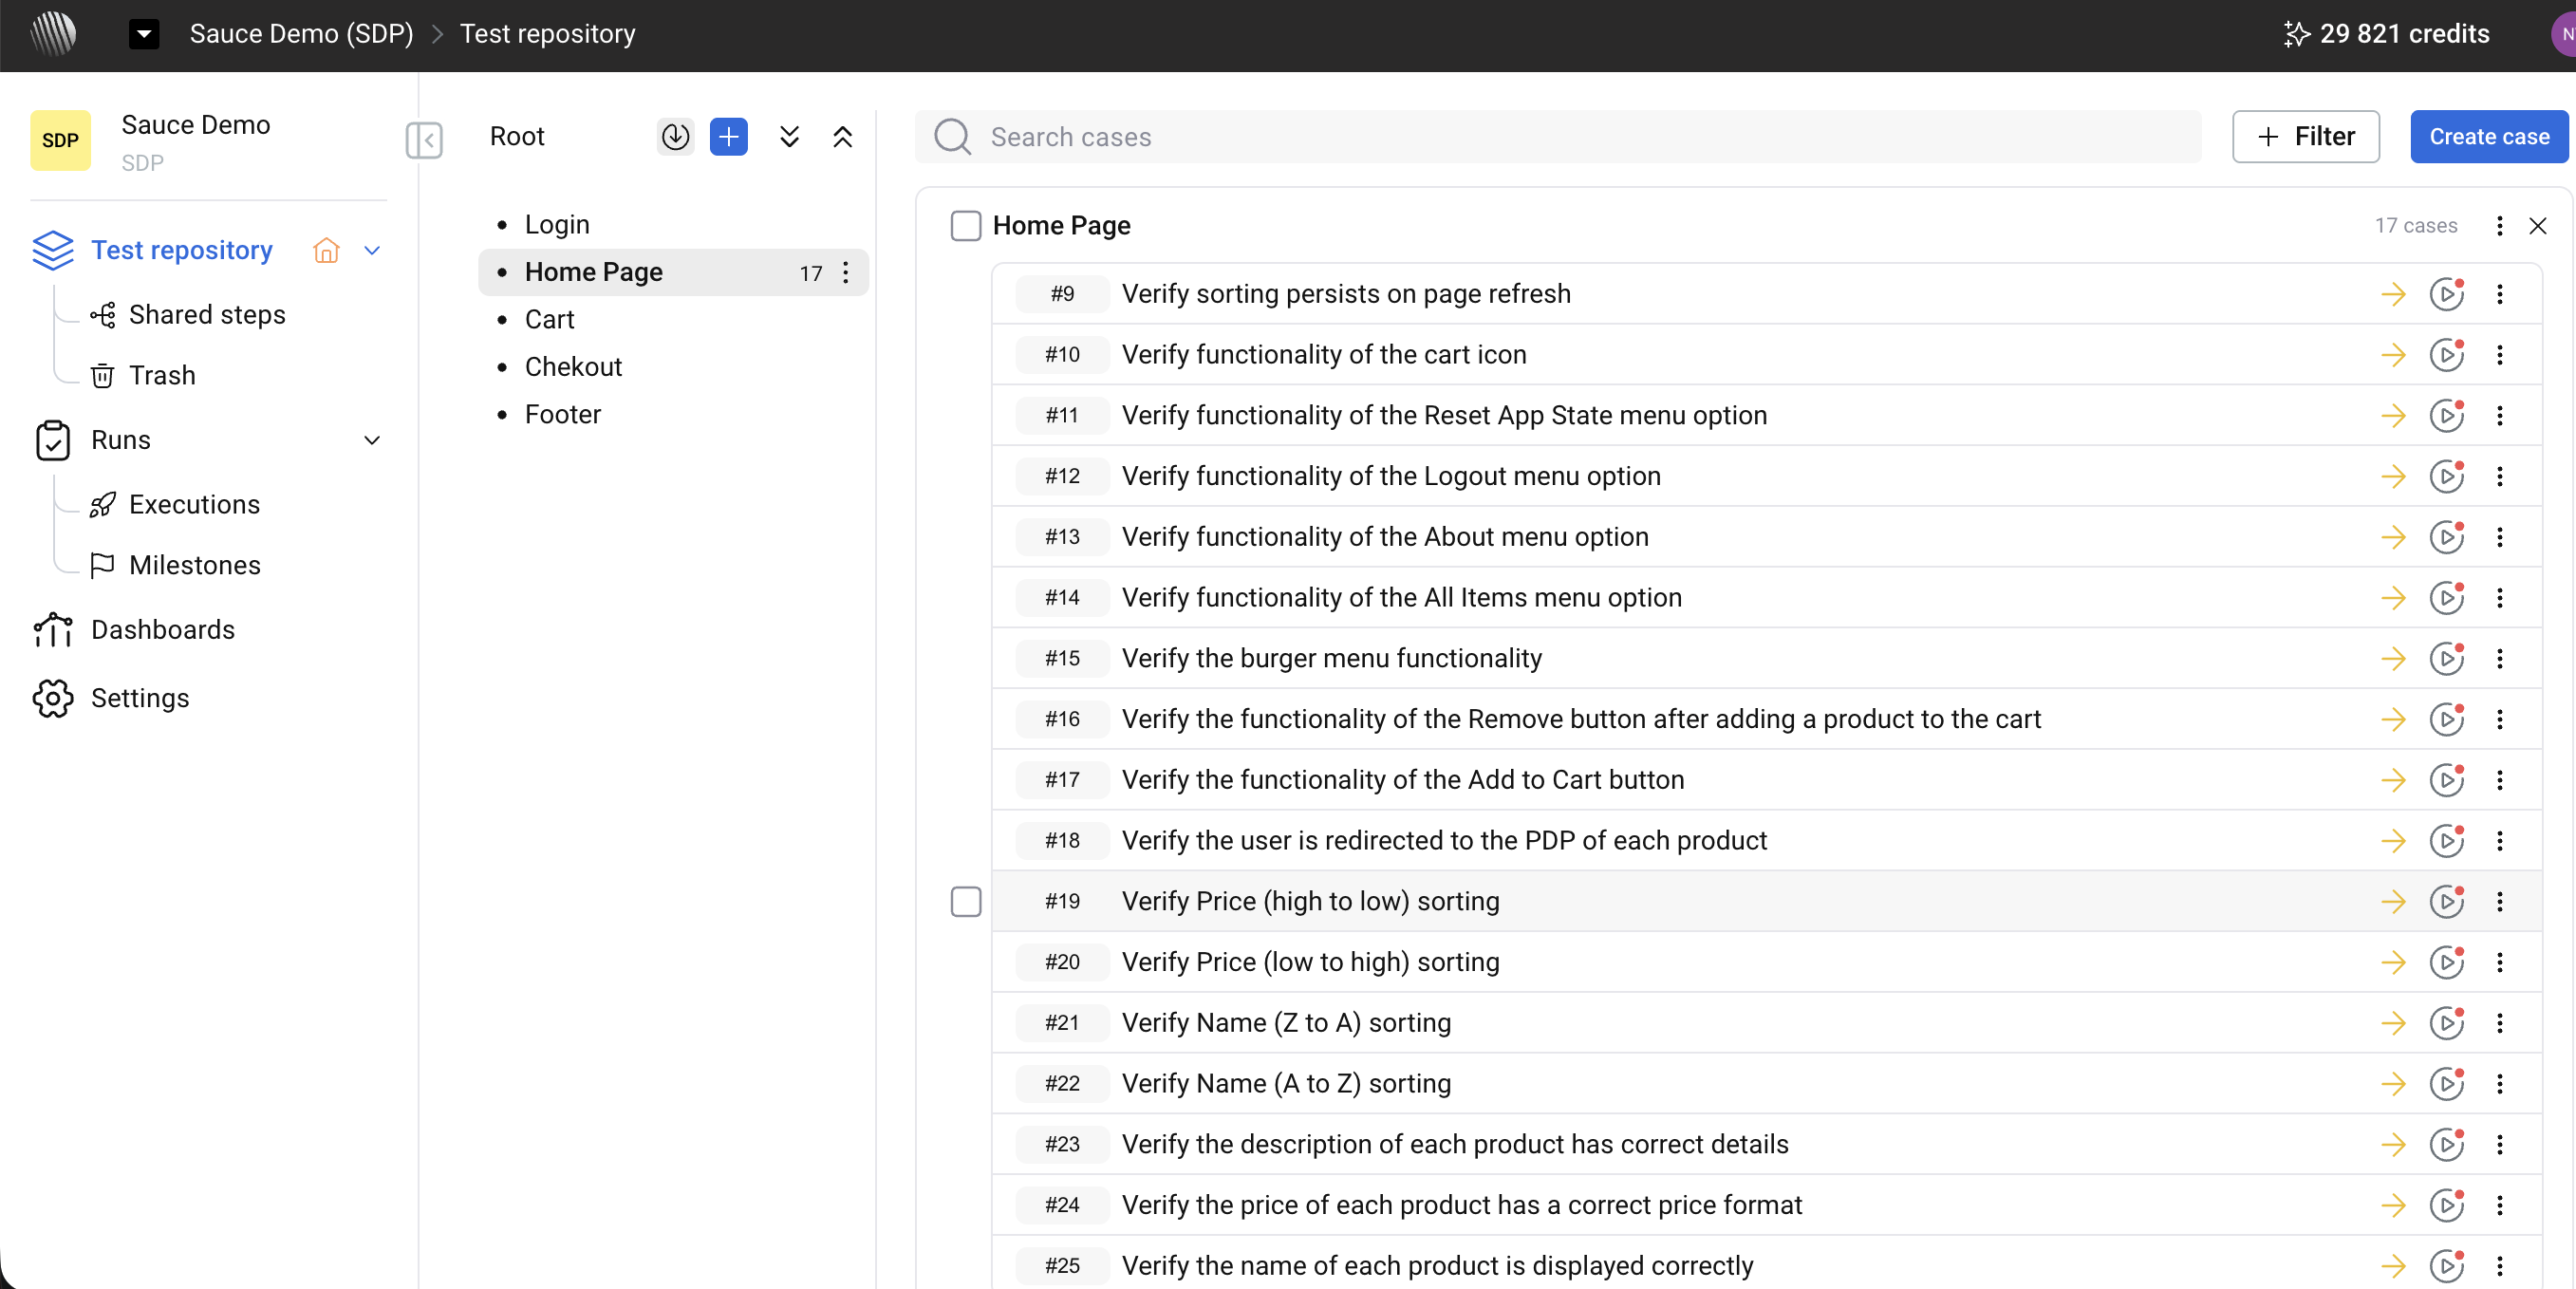
- Test repository — contains test suites and cases, with access to:
- Shared steps — reusable sequences of test steps.
- Trash — deleted cases that can be reviewed, restored, or permanently removed.
- Runs — provides access to test execution and related activities:
- Executions — execution history and results.
- Milestones — testing phases associated with releases, sprints, or other checkpoints.
- Dashboards — provides an overview of testing activity and results.
- Settings — project configuration and management options.
Workspace Structure#
A workspace contains multiple projects and users.
Each project is isolated and includes its own:
- Test repository
- Execution data
- Results
Access to projects depends on user permissions.
Creating Your First Project#
A Project represents a single application or system under test.
Creating a Project#
- Open the project selector (top navigation)
- Select Create a Project
- Enter a project name
- Save the project

The project list displays:
- Project name and key
- Owner or lead
- Visibility (e.g., public/private)
Each project contains:
- Cases
- Runs
- Execution results
It is recommended to create one project per real software product or major development stream.
For a practical guide to transitioning from manual testing to AI-assisted automation, see How to Automate a Manual Testing Process with AI.